Tuesday, August 30, 2011

Humble Beginnings of an Art Wall

How many paintings does it take to call yourself an artist? Ten? Twenty? Should I also mention that these paintings are very, very amateur? I guess I'll keep dreaming.

Last week I painted what I think is my most favorite piece yet...


It was one of the simplest ones I've done but I love the impact of the two shades of pink on the black. Even my husband loves it!

This is probably my least favorite...


It's ok...

I was playing around with techniques and I didn't get it quite right. I can always change it later though!

I picked up this clever piece from an antique store...


It's actually a book of sheet music. You can't beat that title or those colors!


Since of course it's a vintage print and an odd size there was the issue of framing. I picked up this frame from Target and some photo corners from the craft store and simply mounted it on top of the mounting.

I think it turned out quite nice!


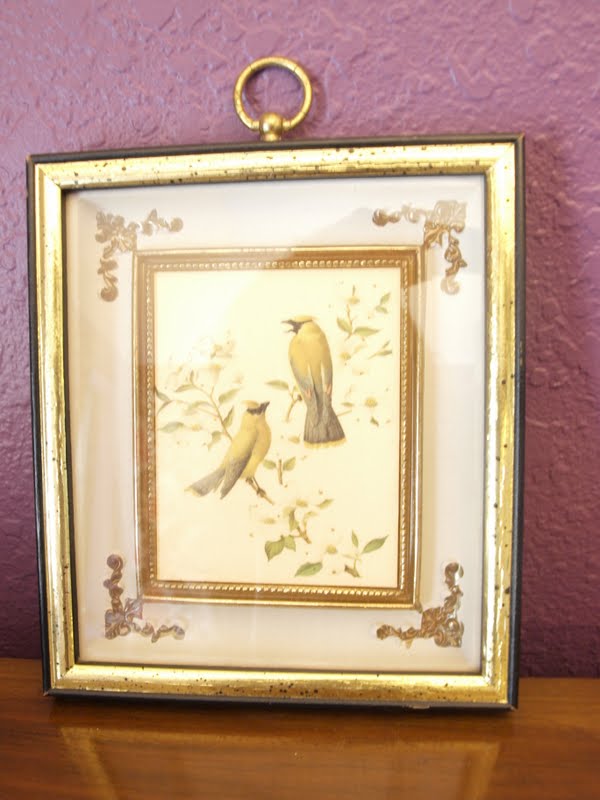
I got this pretty little piece recently as well. I'm not a huge fan of birds but I loved the framing and you couldn't beat the $5 price tag.


I feel as though I almost have enough to actually start hanging everything.


This massive wall sure needs it!


I'm hoping to build the wall a-la-Angie in this inspiration picture. I feel that this art wall is a bit more sparing than you usually see. The pictures aren't as fitted together like a puzzle piece and are a bit more spread out. I think this is better for my space because I don't want the room to feel too heavy on that side.

What do you think? Any pieces you feel I should add to my collection?

Photobucket

Thursday, August 18, 2011

Black Magic Woman

I'm in a dark mood today, but in a good way. Maybe I'm so sick of sunshine my brain is going in the opposite direction? Seriously I think we are at over 40 straight days of above 100 degree weather and absolutely. no. rain.

I think creating a bohemian interior with black takes it to a whole other level. Makes me feel kinda Stevie Nicks...


Must try this!


Have a beautiful day!

Photobucket

Monday, August 15, 2011

Quick Change Monday

Hello Lovers! I know things have been quiet and you guys were probably totally missing me last week. I went on a little Texas Road Trip to visit some friends and family and I was partying on 6th street without internet most of the time. I hit up some great antique stores in the tiniest of Texas towns though. Stayed tuned for that tomorrow!

When I put up my new ombre curtains, they looked so pretty, which made my cluttered mantle look all the worst. So I finally decided to style it up. It had become a catch-all for artwork and nic nacs that I didn't know where to put yet.

Before:

(Oh I miss fires in the winter...instead it's like there's fires outside, all the time...)

After:


I always knew I wanted to put my drippy painting here so I'm glad it's finally in its home. The pink pot is from Home Goods, with a few succulents in it.

Its nice and simple, which is perfect for me. I'm sure I will change it a million times though!

See you tomorrow for my latest thrifts!


Photobucket

Friday, August 5, 2011

Project Week: Ombre Curtains

Here it is! My big project, hand dyed ombre curtains. Most of you know I'm no stranger to undertaking DIY projects but for some reason this one was a bit intimidating to me. It could have easily gone horribly wrong, I could've burned myself with scalding water, wasted money, hated it. But fortunately none of that happened and I love the outcome!


I started out with these Ritva curtains from Ikea. A bargain. The website says $35/pair but I swear I only paid $30...


Some rit dye + internet research and I got started.


I heated up the water in big pots on the stove and dumped them in these tubs to make the dye bath. My husband was on stand by to help me keep things under control. I started doing it by myself and had premonitions of him walking in the room with water boiling, dye everywhere, wet dogs with purple streaks and utter chaos so it was good to have a helper. 

Since I was doing two colors, each beginning at one end of the curtain, I decided it would be best to dye them at the same time. 

Each end of the curtain started in the dye bath, I put about 10-12 inches of fabric in for about 5 minutes, then another 10-12 in for another 5 minutes, until the whole thing was submerged. To blend the center together I went back and for into each dye bath, overlapping as I went.


I didn't do the timing or amount of fabric on each level to an exact science, no sense in getting caught up in something that might not make a difference I guess.

You can see I had some trim in there. I bought this dyeable trim from Joann's to sew on vertically. For dyeing though I just safety pinned it to the curtain.


Then I hung the curtains outside and hosed them down with water and wrung them out multiple times. The whole project was difficult for the mere fact that these curtains are 118" long, so it made it hard to maneuver I guess you could say.

While they looked great at this point, I wasn't happy with them. I wanted them to be very dark on each end and they weren't. So back to the store I went.

I re-dyed each end, soaking for much longer this time, and repeated the whole process again. Finally I was happy!

The only problem was, the trim which was made of rayon shrank considerably, boo. I had cut the trim extra long in case of this very situation and it still shrank probably about 8-10 inches!

Oh well, most of you DIYers know that part of doing projects is rolling with the punches as you go. So I sewed a little bit across the top and bam, I was done!


They look lighter with the light shining through but they are actually pretty dark in reality.


I think I need new curtain rods now, but I freaking love my new curtains!


Have a wonderful weekend everyone!

Photobucket

Thursday, August 4, 2011

Project Week: Custom Frame Refurb

The project I had intended to show you next is taking a bit longer than I expected. Hopefully I will finish it today though and can show you tomorrow. Take my word for it that it's fab.u.lous. though!

You may remember from this post a while back that my mom gave me this great piece of art she had sitting around in her barn.


I just love this piece. I had planned to reframe and mat it but after some quick measurements I realized it was custom framed, so that was out. 

After some brainstorming I came up with a plan to refurbish it that cost a whopping $6!

First I took it all apart and cleaned it up. It was disgusting! I decided the simplest thing to do was cover the outside mat in fabric. This is the only money I spent!

The fabric I bought was very light in color and thin so of course the darker mat showed through. So I whipped out some white spray paint and sprayed it down.


I didn't have to worry about it looking good because it was just to lighten the color.

I had planned to keep the inside mat as is because I thought it was dark gray. But when I took it apart I realized it was actually green that had faded quite a bit.


No worries there though. I sprayed it with some metallic silver spray paint I had lying around. Only a sliver of it will show so I didn't worry about it looking perfect either.

Then I oiled down the frame with Old English Polish. It made a HUGE difference in the appearance. I had originally thought to paint the frame but decided I'd rather keep the wood tone for some texture in the room.

I meticulously covered the mat in fabric with a ton of double stick tape, put it all back together and ta da!


It's hard to tell in this picture but the new matting is actually a very light pink. Combined with silver I think it looks amazing and unexpected!


Here is a side by side for comparison...

 
Sooo much better! I can't wait to hang it on my art wall!
Photobucket

Monday, August 1, 2011

Project Week: Bar Cart Makeover!

I have deemed this week project week on FOW. I have a few projects to show off so why not cram them in to one fun filled week?

Back in May I scored an amazing vintage bar cart for only $50. It of course needed some love and I was happy to give it!


As you can see from this picture, it was a good day at Canton!


Here is the cart before.


As you can see, it wasn't too far gone. It needed a lot of polishing, some tightened screws and some kind of fix on the shelves.

Right off the bat I had planned to paint the shelves a glossy white. But then I noticed that the bottom shelf had a layer of some type of clear plastic-y type covering on it. The only way to get it off was the scrape it with a razor blade. One. Piece. At. A. Time. Yeah, fuck that! Then I thought, glossy white is predictable, why not doing something fun on this little cart?!

So after some brainstorming...


This is the bar cart now!


I ended up covering it in some paper from Paper Source using spray adhesive. Super easy and an amazing look in my humble opinion!


The vase and watercolor painting were holiday gifts from the fabulous Bri.

To get the paper to fit perfectly on the shelves was much easier than I thought it would be. I taped together a bunch of sheets of paper and pressed it into the corners while I traced a line.


There were a few gaps so I just taped another sheet of paper down, drew and cut again until it was perfect. Then I traced it onto the actual decorative paper I used. I laid it onto the bar cart and only sprayed adhesive on each half at a time. This helped to keep it lined up right. I then lowered the paper onto the shelf working my way from the center out to avoid wrinkles.

Here's a sneak peek at the next project I have to share!


Have a great Monday!


Photobucket